

A data breach can cause a chain of unfortunate events for any organization. But adequate cPanel security can reduce your server’s exposure to any attack.
This guide provides 10 steps to secure cPanel and prevent unwanted access. It also explains how to set up your firewall and recover after an attack or disaster.
Strengthening your cPanel security starts with choosing a dependable website builder that supports robust protection and smooth management. The comparison below highlights platforms that offer strong uptime, intuitive dashboards and enhanced security friendly features. Check our recommended website builders here to find the best fit for a safer site setup.
Secure Site Setup Essentials for cPanel Users
| Provider | User Rating | Recommended For | |
|---|---|---|---|
| 4.6 | Beginners | Visit Hostinger | |
| 4.4 | Pricing | Visit IONOS | |
| 4.2 | Design | Visit Squarespace |
Why cPanel Security is Non-Negotiable
cPanel security is more than just protecting your web server. This move is extremely important to your website and brand as a whole.
The Staggering Cost of a Data Breach
Inadequate security continues to cause huge financial loss around the world.
In 2024, the global average cost of a data breach was at its highest. With $4.88 million loss, this figure is a 10% increase from 2023. This shows that poor security is contributing to more financial loss.
Beyond this, breaches damage your brand identity and make customers lose trust in you. You put your business and customers’ data at risk when your server is vulnerable. For server security, it is not about being able to afford it. The focus is on the danger of not having a robust system on the ground.
A Secure Foundation for Your Digital Presence
The foundation of any successful online business is good server security. However, you need to create a professional website to make space for your operations.
In addition, you must choose the best web hosting providers before securing cPanel. This will provide a reliable place for your website to exist. This hosting provider will enable you to create a fast and safe pace for your customers.
Once that is ready, you can start your web creation with the best website builders. Simple options like Hostinger and IONOS provide powerful tools to make the process easier.

You can also take your project higher by pairing WordPress with your hosting service. Many hosting providers even offer managed hosting tools. These solutions have built-in security features to reduce the stress of handling the technical part.
10 Essential Steps to Harden Your cPanel Security
Securing your server is easier with the right pointers. Let’s look at these pointers in ten steps.
1. Implement Strong Authentication & Access Control
The first thing to do is to prevent users you don’t authorize from entering your cPanel account. Weak authentication exposes your main entrance to dangerous people. You can use authentication controls to stop this.
This tool determines the kind of people who can access your server. It also defines what they can do once inside.
Create Unbreakable Passwords for All cPanel Users
The strength of your password has a direct link to your server’s exposure to brute force attacks. People can easily access your account with common passwords.
Use a combination of letters, numbers, and symbols to create strong and complex passwords. Do not use words out of the dictionary or dates pertaining to something personal.
Administrators must use a password of at least 12 characters in length. Meanwhile, the one for other users should be 10 characters.
You can use a password manager to create and save random passwords. Tools like JTR cracker can help in checking the strength of a password before using it. They can also identify weak credentials early.

Here are the qualities of a secure password:
- Length: A longer password is as important as a complex one.
- Randomness: Using random words prevents dictionary attacks.
- Uniqueness: Using different passwords for different accounts prevents credential stuffing.
- Regular rotation: Changing credentials frequently reduces exposure durations.
Enable Two-Factor Authentication (2FA) for an Extra Security Layer
Phishing and keylogging can hack even the strongest password. This makes it necessary for every cPanel and WHM user to have two-factor authentication.
This means hackers don’t only need your password. They also need to gain access to your authentication device physically.
To enable this feature:
- Open WHM, then go to the Security Center.
- Next, select Two-Factor Authentication and turn it on.
In most cases, users find it more convenient to use authenticator apps over SMS-based codes. They can use apps like Google Authenticator or Authy. However, they are easy to intercept.

Restrict Login Access by IP Address
Some IP addresses should not have permission to log into your server. Allowing only trusted IP addresses stops automated attacks from unknown locations.
You can set this up in WHM:
- Go to the Security Center.
- Enable Host Access Control for services like cPanel, WHM, FTP, and SSH.
You should try using a VPN with a stable IP address if you work from different places.
Secure SSH Access: Disable Root Login and Use SSH Keys
The root user is the main target of any attack due to their unlimited power. It is best to turn off direct root user login to reduce risk. Instead, use sudo-enabled accounts. This creates a trail of audit. It also adds an extra level of authentication for privileged operations.
Create SSH keys and turn off SSH password authentication in WHM. Passwords are less secure than key-based authentication. This is because private keys are nearly impossible to brute-force.
Change the standard SSH port from 22 to a non-standard port under 1024. This will prevent the majority of automated scanning attempts.
To create SSH keys in four steps:
- Use your local machine to generate a key pair.
- Upload the public key to your server.
- Go to your SSH configuration to stop password authentication.
- Test the connection, then close your current session.
How to Enable Brute Force Protection with cPHulk

Hackers use automated attacks to try thousands of possible password combinations per minute.
Enable cPHulk Brute Force Protection in WHM. This will block IPs with repeated failed login attempts. Security tools like this monitor attempt to authenticate across all services. It also keeps a database of suspicious activity.
You can also set up cPHulk to block access from specific countries. This is especially important for countries where your business doesn’t operate.
The system will track network connections. It will also look for patterns that resemble credential stuffing attacks.
2. Keep All Software and Systems Up-to-Date
The most common place for attackers to enter your server is through outdated software. They keep finding the weak point in your software.
In addition, attackers always check for servers running unsupported versions. You expose your software to attacks when you keep delaying updates.
Automate cPanel & WHM Updates

It is easy for anyone to forget manual updates. Unfortunately, this can create security gaps. Automated updates make things a lot easier. These updates apply important solutions as soon as after their release. This is often before many people get exploit code.
To turn on automatic updates, do this in WHM. Then, update your preferences. This will guarantee you new security patches at all times.
Ensure maximum security by setting your server to the Long-Term Support (LTS) tier. Setting up automatic updates ahead is essential for your web hosting security.
Patch Your Operating System and Third-Party Apps
Apart from cPanel, you need to cover other components to ensure your server’s security. Always update your server’s operating system with the new security releases. Most Linux systems will have built-in package managers to facilitate this process.
Also, regularly update third-party applications, their themes, and plugins. This includes apps like WordPress and Joomla. These are common targets for attackers because many people use them.

In some cases, these apps have poor maintenance. WordPress users can strengthen WordPress security to ensure safety.
Remove Unused Plugins to Reduce Your Attack Surface
You expose your server to danger every time you install an application. Check your cPanel account to review every installed application, plugin, and theme.
Disable and uninstall any inactive apps to reduce exposure. These inactive plugins still have code that attackers can use.
Namecheap
3. Build an Impenetrable Firewall & Network Defense
A solid firewall setup creates a powerful tool. This tool is useful for tracking and filtering every incoming and outgoing network traffic.
You expose your server to the whole internet without a firewall. Harmful actors may enter every service you run.
Install and Configure a Firewall (like ConfigServer Security)
Installing and setting up a firewall is easy with a few tips.
First, install a firewall like ConfigServer Security & Firewall (CSF). This will help you to manage traffic and prevent attacks. cPanel servers specifically use CSF. This firewall also combines with WHM easily.

Turn on its Login Failure Daemon (LFD). This will enable it to detect and block brute-force attempts automatically. LFD tracks log files in real-time. It also takes quick action against odd activity.
You will need to run the CSF installation script from the command line. You may also use cPanel’s plugin system to install CSF.
Configuration occurs through WHM’s interface. This makes it easier for those who find the following command syntax uncomfortable.
Close Unnecessary Ports to Block Entry Points
Turn off every network port that is not important. This approach will reduce the number of places attackers can enter. A standard port web server only needs ports 80 (HTTP) and 443 (HTTPS) for public traffic.
Here are the common services that you don’t need that often:
- FTP (port 21): Use SFTP instead.
- Telnet (port 23): It is best to always use SSH instead.
- MySQL remote access (port 3306): You should limit it to localhost.
- Mail services for anyone who doesn’t host email.
Remember to update your firewall rules based on the new SSH port.
Activate ModSecurity (WAF) to Filter Malicious Traffic

A Web Application Firewall (WAF) is a unique firewall. This specialized tool understands and filters dangerous web traffic. It protects your server against dangers like cross-site scripting and SQL injection.
Activate the OWASP ModSecurity Core Rule Set in WHM. Then, go to the Security Center and complete ModSecurity Configuration.
Start in interactive mode and check the rules before proceeding to install ModSecurity. Then, enable them around the world. At first, you may get false positives for some real traffic. This will require you to tune the rule.
ModSecurity checks and blocks HTTP requests and responses that match the signs of an attack. It particularly works against automated attacks.
Use a CDN and DDoS Protection for Added Defense
Even servers with an adequate setup can feel the pressure of Distributed Denial of Service (DDoS) attacks.
Add a Content Delivery Network (CDN) to your setup to counter such attacks. CDNs like Cloudflare distribute traffic to numerous servers. This makes it harder for attackers to put pressure on your resources.

You can install Imunify360 to get a complete security suite. This tool provides business-level security for cPanel servers. It also has an advanced WAF and malware protection.
4. Enforce Strict SSL/TLS Encryption Protocols
Encryption is essential in ensuring that transferred data is safe. It is a feature that guarantees your server’s privacy and security with users.
Encryption protects sensitive information like passwords and credit card numbers. Without it, such information will move across the internet in plain text. This means anyone tapping this traffic can read everything.
Mandate SSL for All cPanel Services with AutoSSL
Manual certificate management takes time, and you can even make mistakes. However, you can automatically issue and renew free SSL certificates for your domains. Making it automatic ensures certificates don’t expire when you least expect them.
You only need to turn on AutoSSL in WHM. First, force SSL redirection in WHM. Then, adjust settings to encrypt all connections to cPanel services.
AutoSSL provides free SSL certificates with Let’s Encrypt. But these options are just as secure as paid alternatives.
Despite the cost of SSL certificates, both options are effective. It is up to you to choose the most convenient one.
Disable Outdated TLS Protocols and Use Strong Ciphers

Older protocols have visible weaknesses. These weaknesses allow attackers to decrypt traffic. Plus, modern browsers don’t support these protocols anymore.
You need to stop weak and deprecated protocols like TLS 1.0 and 1.1. Make sure to turn on only modern, secure protocols in your Apache configuration. This covers protocols like TLS 1.2 and Transport Layer Security 1.3.
Set your server to prefer strong cipher suites. These suites provide forward secrecy to secure past communications. This means they will remain safe even if someone exposes your private key in the future.
How to Secure SSH Connections with SSHv2
You need the right protocol configuration for secure shell access. SSH version 1 has an issue with its design that exposes it to man-in-the-middle attacks. This makes it compulsory to use only SSH Protocol 2. This version is more secure than the previous one.
Use the Qualys SSL Labs tool to test your server’s entire SSL/TLS configuration. This free service provides a complete security report. It also identifies specific weaknesses in your configuration.
5. Establish a Bulletproof Backup & Recovery Plan

When things go south, backups are the only savior you have. You can try many features and tools for your cPanel security. But disasters still happen when you least expect them.
Software bugs can corrupt data, and hardware can fail. But backups can prevent you from losing your data permanently in such situations.
Configure Automated, Remote Backups in WHM
Use WHM to adjust your backup settings. Go to the backup and select the backup configuration to set up automated backups. This setting will create a schedule for regular backups without you doing anything.
In addition, you must store these backups on a remote server in a different location. This will protect your data in case something happens to your main server.
Try using the 3-2-1 backup strategy to protect all your data. This means:
- 3 copies of your data.
- 2 different storage media.
- 1 off-site backup.
You can even back up WordPress sites to Google Drive for an extra layer of protection.

The Importance of Testing Your Backups Regularly
Many businesses only find out they have corrupted or incomplete backups when they need them. However, regular testing can prevent this disappointment.
Test the strength of a backup by restoring it to a test environment frequently. This will also help you confirm the recovery process works.
Turn on incremental backups to save storage space while taking in recent changes. Schedule restoration tests to happen every three months.
Remember to document the process. This will ensure your team members can perform recovery when you need it.
Recovering Your cPanel Account After a Compromise
Preventing a breach is not the only thing you need to learn. You must also know how to respond to one.
Use a clean backup to restore your data in case of a data breach. This backup should be one from before the incident.
However, you must find and repair the weak spot before restoring your data. This will block access from future attacks. Check logs to know how the attack happened.
You can also use professionals like Sucuri or Hackrepair to remove dangerous files. These experts can identify infected files and backdoors you may miss with automatic scanners.

6. Harden Your OS and File System Permissions
It is crucial to secure the underlying operating system and file structure for complete security. File permissions determine the person who can read, write, or execute files on your server.
Incorrect permissions make it easy for one user to gain access to another person’s data. They can even execute malicious code.
Isolate cPanel Users with CageFS
Shared servers are efficient, but one exposed account can threaten all others. Install CloudLinux and turn on CageFS to create a lightweight virtualized environment for each user.
This prevents one affected account from exposing others. CageFS doesn’t let any user leave their file system. It makes it impossible to see or access other people’s files. This feature is especially vital for enhancing shared hosting security.

Set Secure File Permissions and Check for Vulnerabilities
Attackers often target world-writable files. These files pose a security risk to the server. However, you can use the find command to locate them.
The principle of least privilege guides proper file permissions:
- Only owners should be able to read files.
- Directories need to carry our permissions for navigation.
- A web server should never write web-accessible files.
- You must protect configuration files containing passwords.
Beyond this, identify permission problems early by running regular audits.
Harden the /tmp Partition Using the securetmp Script
Another common target for attackers is the /tmp directory. They often upload dangerous code to it because it is a default world-writable file. But you can block a common attack vector by preventing execution in it.
Use the command line to run the /usr/local/cpanel/scripts/securetmp script. This mounts nosuid and noexec options on the /tmp directory. This helps to prevent the execution of unapproved scripts.
Implement Symlink Race Condition Protection
Attackers can take advantage of symbolic links to gain access to unauthorized files. Symlink attacks work by developing symbolic links to sensitive files. Naturally, attackers shouldn’t be able to read these files.
But you can prevent this by turning on Symlink Race Condition Protection. You can do this in the EasyApache. This feature prevents malicious users from exploiting symbolic links.
7. Manage User Accounts & Restrict Shell Access

cPanel users need different levels of access. A single user with too many permissions can expose the whole server intentionally or by mistake. But limiting privileges reduces this threat.
Apply the Principle of Least Privilege to cPanel Users
Think about the minimum level of access a user needs to carry out their duties. Then, assign roles and permissions based on it.
This approach reduces damage from insider threats and affected accounts.
For example, the following users don’t need these permissions:
- Content editors don’t need access to the database.
- Developers don’t need root access.
- Email users don’t need FTP access.
Disable Shell Access for Non-Administrative Accounts
The wrong user can use command-line access as a powerful and dangerous tool.
To disable shell access:
- Open WHM.
- Select Account Functions.
Manage Shell Access and turn off shell (SSH) access for all non-admin accounts. Provide VirtvF3 Jailed Shell for users who need limited command-line access.
This allows users to only explore their home directory. It prevents them from going through the server configuration. Also, they can’t access other users’ important files.
Set Shell Resource Limits to Prevent Server Overload

Your whole server can go down due to runaway processes.
Configure resource limits in the /etc/security/limits.conf file. This prevents one user or script from taking up all server resources (CPU, RAM). It prevents a crash from happening.
Resource limits prevent poorly written PHP scripts from causing accidental resource exhaustion. It also protects your server against malicious attacks. They ensure that one affected account can’t touch others on the same server.
8. Implement Proactive Intrusion Detection & Monitoring
It is vital to keep monitoring to detect and respond to attacks in real-time. Many people often go months without detecting a breach. This gives attackers enough time to steal data or install backdoors.
Use cPanel’s Security Advisor for Automated Checks
You can make mistakes with manual cPanel security audits. Besides, they take a lot of time. Run the Security Advisor in WHM frequently.
This will enable you to scan for potential misconfigurations and weaknesses. The tool provides color-coded warnings, with red indicating severe. It also offers actionable advice to improve your security posture.
The Security Advisor checks for issues like:
- Weak passwords
- Outdated software
- Insecure service configuration
- Missing security patches
- Improper file permissions
Make sure to tackle red warnings instantly. You can create a schedule to resolve yellow warnings.
Install Fail2Ban to Block Malicious IPs Automatically

One failed login attempt is not enough to stop attackers. But Fail2Ban can analyze log files in real-time. It then applies firewall rules to block strange IPs. It works against brute force attacks and other automated threats.
Install Fail2Ban to check log files for anything that looks suspicious. It can monitor repeated failed login attempts and exploit scanning. Set it up to automatically ban the IP addresses of suspected hackers.
This tool can monitor many services at once. This includes SSH, FTP, email, and web applications. It has custom filters to detect attacks on specific applications.
Monitor Logs and Conduct Regular Security Audits
Always check system, Apache, and mail logs for any unusual activity. Schedule manual security audits every three months to support automated tools.
Look for:
- Login attempts from unusual locations.
- Access to sensitive files.
- Sudden changes to configuration.
- Strange traffic patterns.
- The same IP is accessing many websites.
Use Antivirus Software and Monitoring Tools
Malware can also infect Linux servers. Install a specialized tool to scan for Linux malware and rootkits.
You can install popular options like:
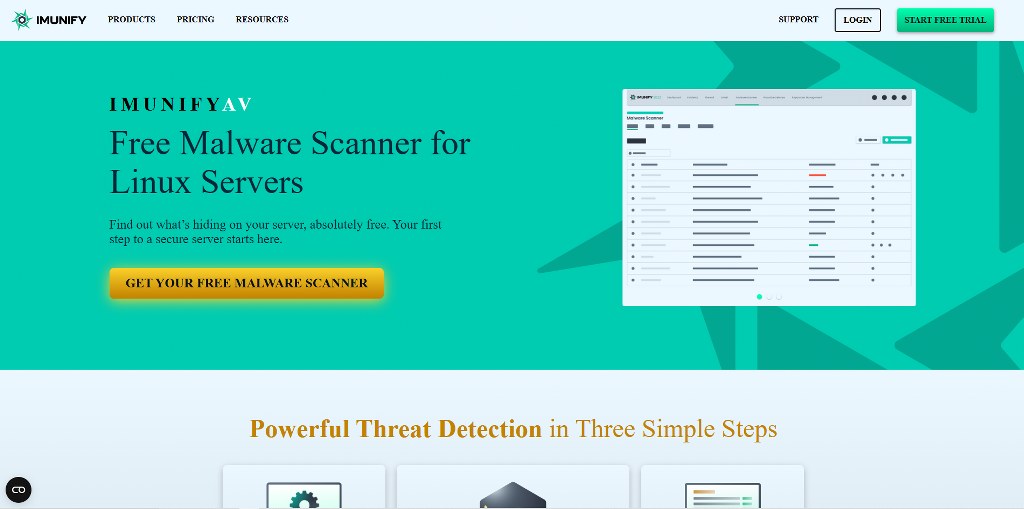
- ImunifyAV: This is a free antivirus software scanner. It works for servers using the ClamAV scanner engine.
- Tripwire: This tool monitors file checksums to find unauthorized changes.
- Chkrootkit & Rkhunter: They scan for common rootkits and weaknesses.

The rootkit hunter tool is perfect for finding rootkits that hide harmful processes and files from standard system tools.
It is best to set time for running regular scans and reviewing the results. Check the results carefully because some may be false positives.
9. Secure Web Server, Database, and PHP Configurations
Software developers focus more on ease of use and compatibility. This makes them pay less attention to security. This means you will often find security features disabled on default settings.
Harden Your MySQL Database Security Settings
Your most sensitive information is on databases. Unless it is necessary to have external connections, limit MySQL access to localhost.
Ensure every database user has a strong and unique password. Turn off the SHOW DATABASES command for non-root users.
Remote database access is a tool for attackers. Don’t open the MySQL port directly to the internet if remote connections are necessary. Instead, use SSH tunneling.
Here are some extra steps to strengthen MySQL:
- Remove accounts belonging to anonymous users.
- Remove test databases.
- Turn off FILE privilege for non-admin users.
- Track unusual activities by enabling query logging.
- Each application should have separate database users.
Tweak Your PHP Global Configuration for Better Security

The flexibility of PHP makes it powerful, but also exposes your server to danger.
Turn off potential dangerous features like exec, passthru, and shell_exec in your php.ini file. PHP scripts use these functions to carry out system commands. However, attackers can use them to take control of your server.
Enable open_basedir restriction in WHM’s MultiPHP Manager. This will stop PHP scripts from accessing unapproved files.
Other important settings for PHP security include:
- Preventing remote file inclusion by disabling allow_url_fopen.
- Hiding version information by setting expose_php to Off.
- Enabling display_errors only in development environments.
- Setting up the right memory and execution time limits.
Secure Your Apache Installation to Prevent Information Leaks

Every site you host depends on your web server configuration. Prevent visitors from browsing your file structure by stopping directory listing in your httpd.conf file.
Disable server signatures and server tokens in your Apache Global Configuration. This enables you to avoid showing your server version. Attackers can search for known weaknesses when they have information about your exact Apache version.
Always restart Apache after adjusting Apache configuration settings. This will enable the new settings to take effect. Test thoroughly to ensure all functionalities are working.
Prevent Email Abuse with SPF and DMARC
Email spoofing makes it easy to carry out phishing attacks. But you can protect yourself and your customers with proper email filters and authentication.
Use Sender Policy Framework (SPF) and DMARC records for your domains. SPF chooses the specific mail servers that can send email from your domain. DMARC sends signals to receiving servers to take action on messages that fail authentication.

These methods of email authentication help to prevent attackers from spoofing your domain. It is your shield from various types of web attacks that use email as a tool.
10. Disable Unused Services and System Compilers
Every running service has the potential to expose your server to attacks. Moreover, unnecessary services take up server resources. This means you need to turn off any service you don’t use.
Deactivate Unused Services and Daemons in WHM
Both necessary and unnecessary services run by default. Review all running services and daemons with WHM’s Service Manager.
Turn off any services that you don’t need for your server to operate. This helps to reduce its attack surface.
Common unnecessary services include:
- FTP server configuration (if you only use SFTP)
- DNS server (if using external DNS)
- Mail server (if not hosting email)
- Database server (on web-only servers)
Restrict Compiler Access from the Command Line or WHM
Attackers can build custom exploits on your server due to compilers.
Turn off C and C++ compilers for all users. Only leave those in the dedicated compilers group. You can do this through WHM. Then, go to the Security Center. Select Compiler Access or run/scripts/compilers off on the command line.
Genuine users rarely need compiler access. However, attackers mostly use compilers to build rootkits. They also need them for other malicious code optimized for your server configuration.
You can restrict compiler access using several methods. However, the cPanel script is the simplest method for most administrators.
Conclusion
Ensuring your cPanel security requires constant inspection and changes. But you can keep up with it by following the 10 steps we have outlined. Always review your setups and get updates about new threats to stay ahead.
While at it, you should also focus on Domain Name System security for your site.

Next Steps: What Now?
Follow these practical steps to secure your cPanel:
- Create a professional website with powerful hosting.
- Enable two-factor authentication and restrict access by IP addresses.
- Regularly update all systems and software.
- Install a firewall and ModSecurity, then make SSL and TLS protocols compulsory.
- Create and save backups of your data in a remote location.
- Determine which users have permissions to files.
- Limit shell access and manage user accounts.
- Strengthen your database and PHP configuration.
- Keep monitoring new methods attackers can use.
Further Reading & Useful Resources
Here are more resources for you:
- Hacking Statistics: Discover the frequency of cyber threats.
- Email Encryption Keys: Learn how to send an email with encryption keys.
- Cyberinsurance for Small Businesses: Get cyberinsurance for your small business.
- cPanel Email Encryption: Secure your emails with cPanel.
- SSL Certificate Errors: Understand and fix your SSL certificate errors.

