

A mood board is a powerful tool for creative web designers. Learning how to create a moodboard helps you turn abstract ideas into a visual plan for a site’s design.
This guide explains everything about mood boards in web design. You’ll learn why you need it and how it enhances your productivity and output.
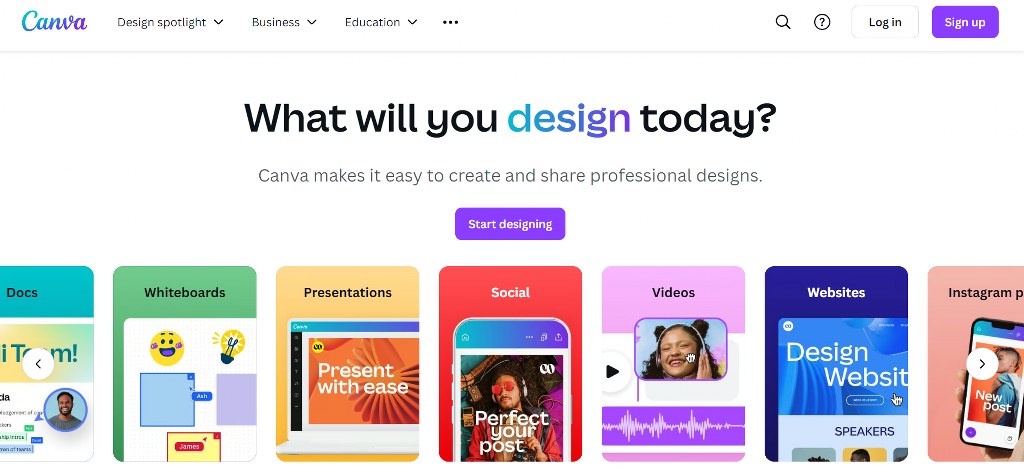
Mood boards help visualize design concepts, but a professional website is key to showcasing your creativity online. Website builders allow you to create visually appealing, responsive sites without coding skills. Explore our recommended website builders to launch a website that brings your design ideas to life.
Build Your Creative Website with the Best Website Builders
| Provider | User Rating | Recommended For | |
|---|---|---|---|
| 4.6 | Beginners | Visit Hostinger | |
| 4.4 | Pricing | Visit IONOS | |
| 4.2 | Design | Visit Squarespace |
What Is a Mood Board and Why Do You Need One?
A mood board is a visual collage of images, textures, colors, and text used to communicate a particular theme or concept. Think of it as your project’s north star – a reference point putting everyone on the same page throughout the creative process.
This powerful visualization tool can prevent costly design mistakes. It helps to clarify your direction before you start, so you don’t dive headfirst into a project and hope for the best. You can create a roadmap that guides every decision.

Here’s something fascinating: studies suggest you are more likely to achieve goals if they’re written down. A mood board takes this concept further by providing a visual representation of those goals.
When you can see your ideas laid out in front of you, they become tangible and achievable.
Creative professionals across industries rely on mood boards daily. Interior designers use them to convey a space’s personality to clients. Photographers create them to establish the mood for photo shoots.
Event planners develop boards to communicate their outlook to vendors. Brand strategists use them as a key part of developing visual identities.
The beauty of mood boards lies in their versatility. Whether you’re redesigning your living room or launching a business, they help you focus and communicate your ideas effectively.
How to Create a Moodboard: A 5-Step Guide from Creative Professionals
Creating an effective mood board is more than just throwing random images together. Professional designers follow processes that ensure their boards serve their intended purpose.
1. Define a Clear Vision for Your Mood Board
![]()
Start with a clear objective to keep your board focused. Without direction, you’ll end up with a scattered collection of pretty pictures.
Brainstorm 5-10 specific adjectives that evoke the feeling you want to inspire. Instead of vague words like “nice” or “fun,” dig deeper. Think warm, rich, fresh, delicate, bold, or sophisticated. These keywords become your filter for every design element you consider.

Give your board a name and write down your initial ideas before collecting any images. This step provides crucial direction. Without it, it’s easy to get lost in the inspiration phase. Your written words become the foundation that supports your visual choices.

Think about it this way: if you can’t explain your vision in words, how will you recognize it in images? This upfront thinking makes the entire design process more productive and purposeful.
2. Gather Inspiration Widely, Then Curate Ruthlessly
Begin by collecting a large volume of inspiration. Source at least 30-40 visuals that align with your theme. Cast a wide net during this phase. Second-guessing is your enemy, so save anything that resonates with your dream.
Every platform offers different types of inspiration. Sources like Pinterest, magazines, or design libraries like Behance are great for images, patterns, and fonts. Go through multiple sources to develop an intensive collection.

Now, you need discipline to review your collection and identify emerging patterns. Then, curate ruthlessly. Narrow your selections down until you have 7-12 core images left that represent your idea.
This editing process is where the magic happens. You’ll start to notice a recurring color scheme, texture, and style that aligns with your dream. Trust this process – your subconscious often knows your aesthetic preferences better than your conscious mind.
Namecheap
3. Choose Your Format: Physical vs. Digital Mood Boards
The format you choose dramatically impacts how you create and use your mood board. Designers can either use physical or digital boards. Depending on the project, many professionals use both for their distinct advantages.
The Case for Physical Mood Boards
Physical mood boards offer a tactile, hands-on experience by incorporating real-world materials. There’s something powerful about touching physical media that digital versions can’t replicate. You get to pick out fabric swatches, paint chips, and paper samples for your project.
Pro designer Mark Sikes is pro-physical. He uses physical boards with fabric swatches, tear sheets, and paint chips to define a project’s palette. This approach lets him see how materials interact in real lighting conditions. It helps his clients understand the actual feel of proposed design elements.

Creating a physical board becomes an engaging collage and a piece of art or inspiration in your workspace. Many designers keep their boards displayed throughout their design process. It provides constant visual reference and inspiration.
The Power of Digital Mood Boards
Digital mood boards allow for adaptive content like videos, animated GIFs from Giphy, and audio from SoundCloud. This multimedia approach conveys mood and feeling better than static images can.

Digital boards also build collaboration with remote team members. Collaborators can respond and edit in real-time. This feature helps when working with clients or team members in different locations.
Tools like Milanote allow you to post notes and context to your choices. This helps in making the board a clear communication file. You can explain selected images and how they relate to your overall goal. This helps you create a broader creative brief.

4. Assemble and Arrange Your Elements
A layout can make or break your project, so experiment with different templates. Try out patterns like structured grids or an organic, free-flowing collage until it feels balanced. The way you organize your elements affects how others interpret your vision.
Designer Amy Neunsinger offers valuable advice on arrangements. She encourages adding “strange stuff” that offers a unique visual clue or beauty to enrich your board’s language.

Be bold and add unexpected elements that fit your aesthetic. Even when they don’t relate to your project.
Ensure every item contributes to the overall story and promotes your theme. You know something doesn’t fit when you can’t explain why it should belong on your board.. Each element should support and strengthen your message.

Consider the visual flow of your board. How does the eye move across it? Are there focal points that draw attention? The arrangement should feel intentional.
5. Share Your Vision and Bring It to Life
A website is an online directory or catalog that can give you visibility as a professional. It can feature your previous and current projects, as well as how to engage with your services.
Your finished mood board helps to express your idea to clients, stakeholders, or collaborators. It bridges the gap between your imagination and others’ understanding of your ideas.
For creative professionals, mood boards often serve as the first step towards a brand’s visual identity. This work is best showcased on a professional portfolio website. Building one is simple with beginner-friendly website builders like Hostinger or IONOS.

To bring your unique vision to life, you can hire a designer on a freelance platform like Fiverr or Upwork. Make sure to build your site with the best web hosting service to ensure it’s fast and reliable.
Your mood board becomes a living document that guides decisions throughout your project. Reference it regularly to stay on track and maintain consistency in your choices.

Top Digital Tools for Creating Mood Boards
- The right tool can make or break your mood board experience. Here are the top choices used by professional designers:
- Canva is recommended for most people due to its free plan and ease of use. It’s so simple that an 8-year-old can use it to create a board in minutes. The platform offers templates specific to mood boards, making the process straightforward for beginners.
- Milanote stands out as a powerful tool for creatives. It features a web clipper, a built-in library of over 3 million free photos, and real-time collaboration. It’s designed with features that traditional design tools lack. This makes it perfect for creative projects.
- Google Slides is favored by designers like Jessica Davis of Atelier Davis. It is prized for its “super collaborative” features, allowing teams to comment and work concurrently. Its flexibility and collaboration features make it surprisingly effective, even for mood boards.
- Pinterest serves as an invaluable starting point to gather inspiration. Pro designer Hema Persad advises users to “pin with abandon” to uncover underlying patterns in their taste.
- Use Pinterest for initial inspiration gathering. Then, sift through and transfer your favorites to a more structured tool.


Each tool serves different needs, so consider your specific requirements. Need collaboration? Choose Google Slides or Milanote. Want simplicity? Go with Canva. Focusing on inspiration gathering? Start with Pinterest.
How Different Pro Designers Approach Their Mood Boards
Top designers use varied techniques to build their mood boards. Notable examples are Mark Sikes’s tactile, physical creations and Atelier Davis’s collaborative digital-first approach. This table breaks down their unique methods.
| Designer/Studio | Key Approach/Favorite Technique | Format Preference | Notable Elements Included | Purpose/Benefit Highlighted
|
| Mark Sikes | Physical mood boards with thumbtacks, tear sheets, fabric/trim samples. | Physical | Tear sheets, fabric samples, trim samples, furniture, lighting, rugs. | Defines the palette and direction for the house, specific to each room. |
| Sagrada Studio (Hema Persad) | Pin with reckless abandon, then look for patterns and “dig deeper” into emerging themes. | Digital (Pinterest) | Client inspiration images (Pinterest boards). | Pulls out the client’s thoughts, identifies repeating patterns. |
| Amy Neunsinger | Don’t be afraid to put in “strange stuff” if it offers visual language or beauty. | Physical (Flat lay) | Art, pottery, plants, photographs, tiles, textiles, “strange pots.” | Offers visual clues, beauty transcends to design, and creates visual language. |
| Atelier Davis (Jessica Davis) | Uses Google Slides for collaboration; emphasizes pulling physical samples alongside digital. | Digital (Google Slides) & Physical | Concept imagery, pictures of fixtures, physical material/finish samples. | Super collaborative, allows comments and concurrent changes, defines spaces. |
| Leanne Ford | Create tactile masterpieces; save anything drawn to; rip and tear sheets from magazines. | Physical (Collage/Installation) | Magazine tear sheets, various inspiring items. | Tactile experience, input for a creative soul, doubles as art. |
Consider learning from multiple approaches. You might start like Hema Persad by gathering extensive Pinterest inspiration, then narrow your focus like Amy Neunsinger by including unexpected elements that add visual richness.

The color selection process these designers use often becomes crucial for digital projects, where understanding color psychology and harmony can make or break a design.

If you’re interested in expanding your design toolkit beyond mood boards, explore inclusive web design tools to develop your creative and professional skills.
Many creative professionals find that developing mood board skills attracts additional income opportunities. The visual communication skills you develop can translate into profitable graphic design work when combined with digital design capabilities.
Modern mood board creation incorporates innovative technology. Tools for AI image generation can give you unique visual elements when existing photos fail to capture your thoughts.
Conclusion
Creating effective mood boards is both an art and a science. Balance your technical skills with tools and templates and an intuitive design sense.
Practice makes perfect with mood board creation. Start with personal projects to develop your skills before taking on client work. Each board you create teaches you something positive about visual communication and helps train your aesthetic eye.
Using a rich moodboard ensures you build an effective and efficient website. However, you must first learn how to build a brand from scratch.

Next Steps: What Now?
To create an effective and engaging mood board, consider the following:
- Visualize objectives for your mood board.
- Source and curate inspiration from different sources.
- Choose your preferred format between digital and physical mood boards.
- Arrange the different elements for your project.
- Share your vision with collaborators and clients.
Further Reading & Useful Resources
- What is Pinterest? How to Use Pinterest to Find Inspiration.
- Where to get images for website design: Find quality images for your design project.
- Creating a Logo: Building brand identity for your business.
- Make a Graphic Designer Portfolio: Portfolio guide for beginner graphic designers.
- Learning Website Design: Fundamentals to building a good site.

